


OBD Diagnostic
Vehicles are a great possession. They make lives easier and better. Travelling becomes faster and less stressful. However, not every day is a good day. Imagine waking up to a bright work day. Before you can even get the vehicle out of the garage, you notice some whining sound when you put the vehicle in gear. You are already late and you are now torn between going to the mechanic and driving to work. You feel some sense of worry as you are not sure if the car is safe for driving.
Such anxiety can ruin your journey. Driving requires maximum concentration and peace of mind and nothing feels great than being on the road assured that everything is okay. How do you make that happen? Getting a car diagnostic tool is the best way to ensure that your car is in the best shape every time before leaving home, school or the workplace. It allows you to diagnose any issue that you could be having with your car before taking it to the workshop.
How Do use The Car Diagnostic Device?
The process involves some steps and you must ensure that you are doing it right to get the right results. Let’s have a look at the basics;
- Turn off the car
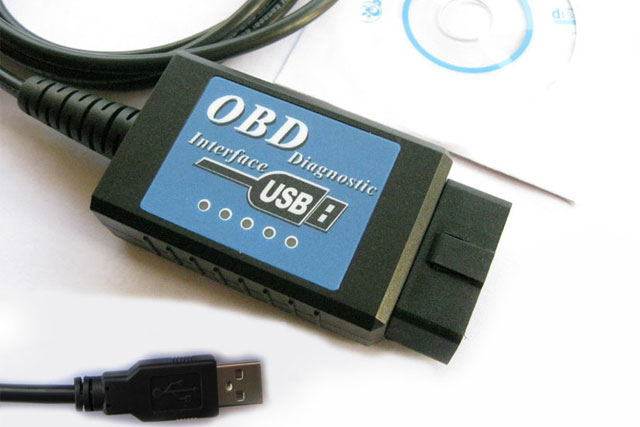
- Plug in the OBD Diagnostic scanner into the OBD link connector located on the driver’s side, particularly on the left side of the steering wheel. The cable has a pin plug that should be fitted in the vehicle’s outlet.
- Once the OBD Diagnostic is connected to the car, switch on the ignition key to put the vehicle in the running car and let the scanner initialize. Depending on the type of your scanner, you may be required to press a power button to begin the process while to some; you may have to go manual.
- The scanner will then show the data that you need to key in for it to show results. These include the car type, model, and the engine’s make among others. After entering the details, you can begin the scanning or reading of the car’s diagnostic system. Again, this depends on the kind of scanner you are using. Some may have the initiation button while others need to go through a manual procedure for that.
- Once the scanner is done, it will provide you with some diagnostic trouble codes which you need to interpret to know to know exactly what the problem is. This is the most challenging part because you need to have a clear understanding of the scanner and what the codes mean before solving the issue. The scanner may display one code or several of them depending on the number of issues it diagnoses. You can either write the codes down or transfer them to your laptop for easier reading and interpretation.
- Turn off the ignition key and then unplug the scanner safely from the car.
It is easy, right? The whole process will only take you a few minutes and what is in store for you? You can travel to wherever you want with peace of mind and assurance that the chances of your vehicle breaking down in the middle of the journey are minimal.